
Introduction:
Burp Suite, developed by PortSwigger, is a powerful and widely-used integrated platform for web application security testing. It’s an essential tool for professional penetration testers, security researchers, and bug bounty hunters. Burp Suite’s core function is to act as a proxy, intercepting and analyzing all traffic between a user’s browser and a web server. This allows for detailed inspection and manipulation of requests and responses, helping to identify and exploit security vulnerabilities such as SQL injection, cross-site scripting (XSS), and more. This guide will provide an introduction to the tool, its system requirements, and a summary of the installation and configuration steps.
System Requirements
To ensure Burp Suite Professional runs smoothly, you need to meet a few key requirements. While it’s a cross-platform tool, performance is dependent on your machine’s resources, especially when performing intensive tasks like automated scans.
- Operating System: Burp Suite runs on Windows, Linux, and macOS. The provided guide focuses on Kali Linux, a popular choice for penetration testing.
- Java Runtime Environment (JRE): Burp Suite is a Java-based application, so a compatible JRE (version 1.7 or later) must be installed.
- CPU: A minimum of 2 cores is recommended, but for more advanced tasks like running automated scans, 4 or more cores are better.
- RAM: While a minimum of 4 GB is required, 8 GB or more is highly recommended for general use. For large or complex applications, or for running multiple scans, you may need 16 GB or more to prevent performance issues.
- Disk Space: A basic installation requires about 1 GB of free disk space. However, project files can grow significantly, often up to several gigabytes, so it’s a good idea to have at least 30 GB of free disk space for larger projects.
Installation Process:
Installing Burp Suite from PortSwigger website
Step 1: Install Burp Suite Professional
- First, you need to download and install the software. You can download the installer from the PortSwigger website.
Download the Installer:
- Go to the PortSwigger website https://www.portswigger.net/

- Click on Support tab, then the download tab
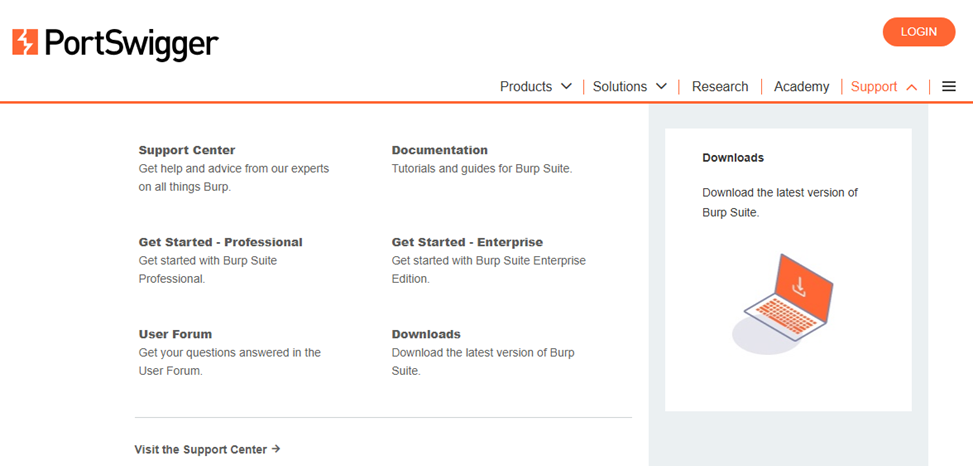
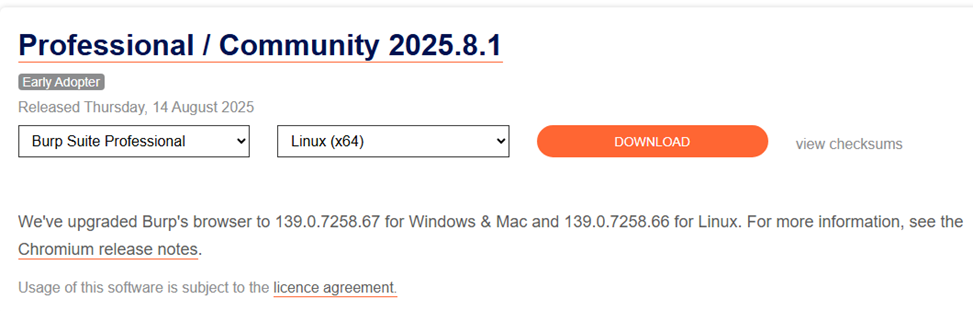
- Choose and download the Linux installer (.sh file) for Burp Suite Professional.
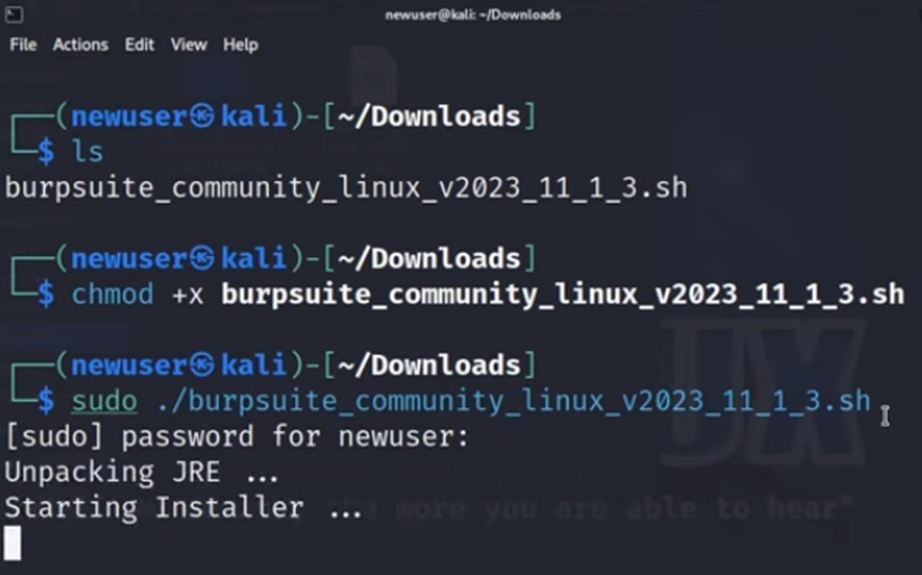
Make it Executable:
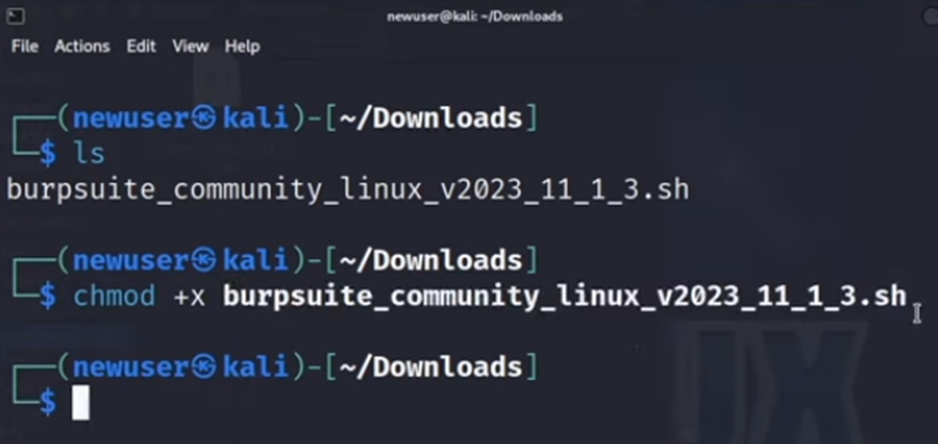
- Open a terminal on your kali and navigate to the directory where you downloaded the file.
- Make the installer executable using the command:
chmod +x burpsuite_pro_linux_2025.8.1.sh
Run the Installer:
- Execute the installer from the terminal:
./burpsuite_pro_linux_2025.8.1.sh
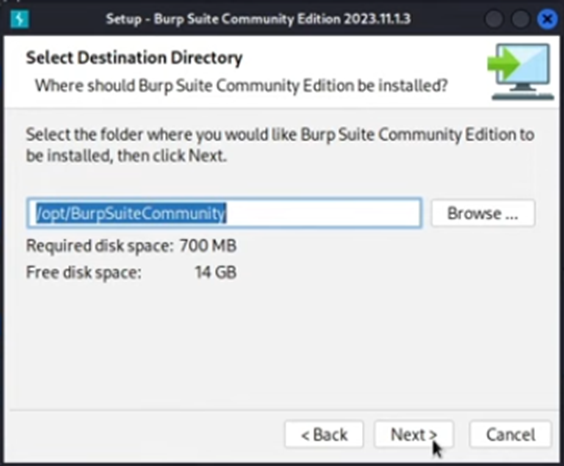
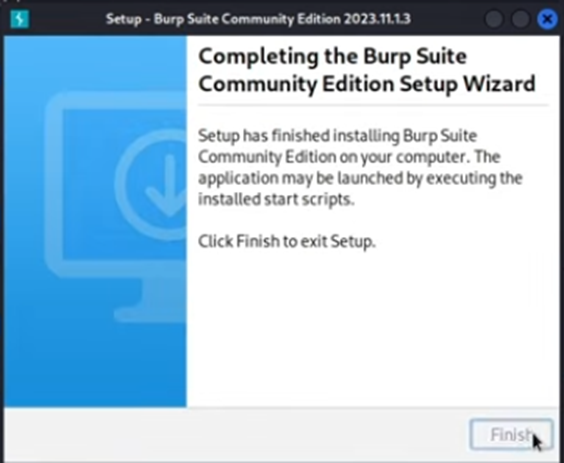
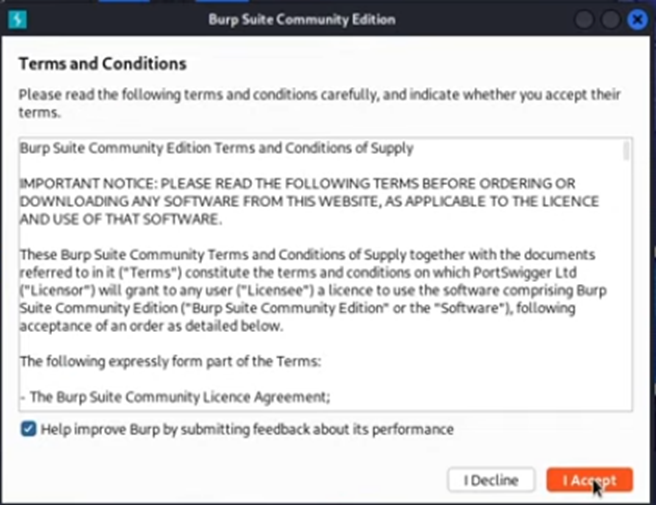
Follow the Prompts:
- The installer will guide you through the process.
- Accept the license agreement, choose your installation directory, and complete the installation.
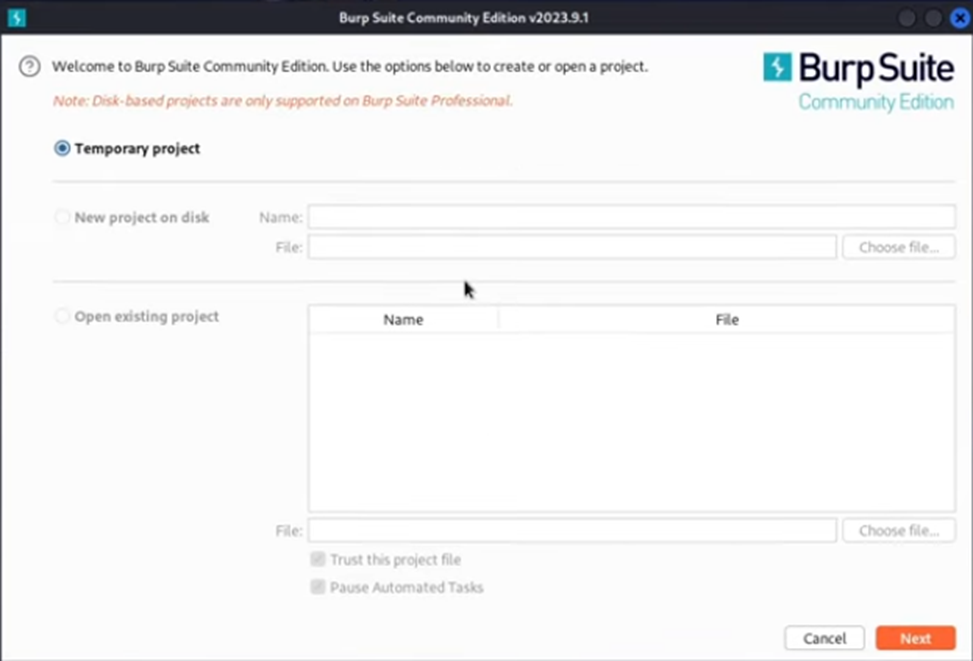
Activate Your License:
- When you first launch Burp Suite Professional, you’ll be prompted to enter your license key to activate the software.


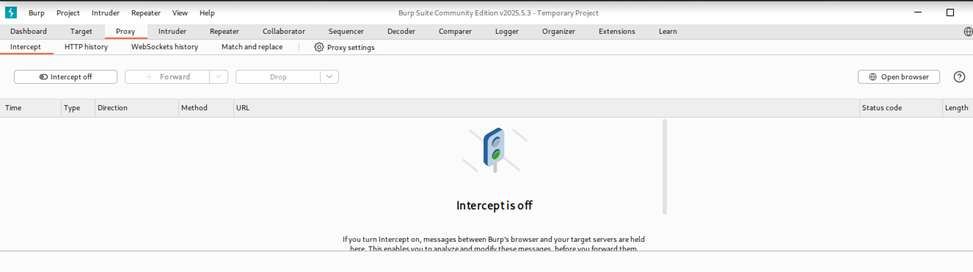
Step 2: Configure the Proxy
- Burp Suite’s core function is to act as a proxy, intercepting traffic between your browser and the web server.
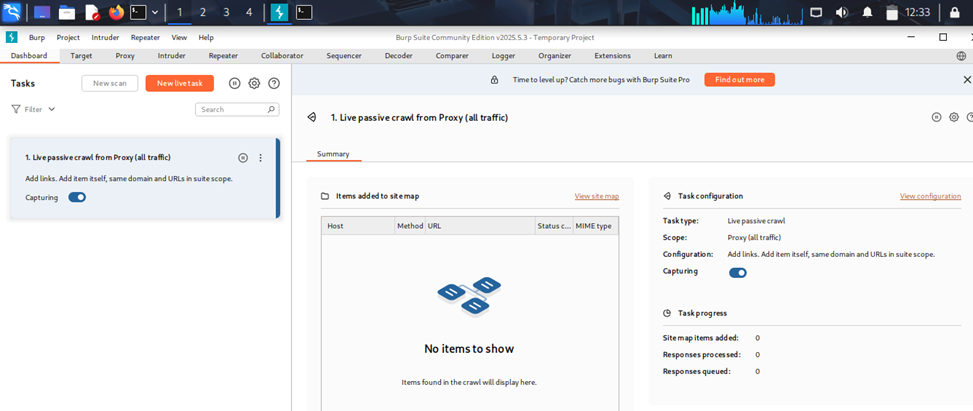
Launch Burp Suite:
- Start the application from your Kali Linux applications menu or by typing burpsuite in a terminal.

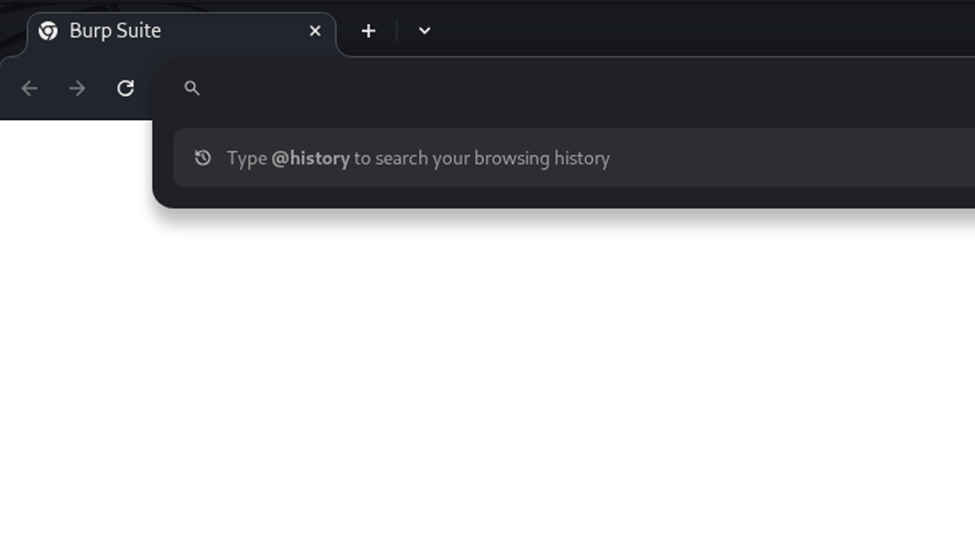
Open Burp’s Browser:
- The easiest method is to use Burp’s built-in browser. In the Proxy tab, go to the Intercept sub-tab and click the “Open Browser” button. This launches a Chromium browser that is pre-configured to work with Burp’s proxy and certificate.
- Manual Proxy Configuration: Open your own browser like Firefox, and configure it manually.
- In Firefox, go to Settings > General > Network Settings and click the Settings… button.
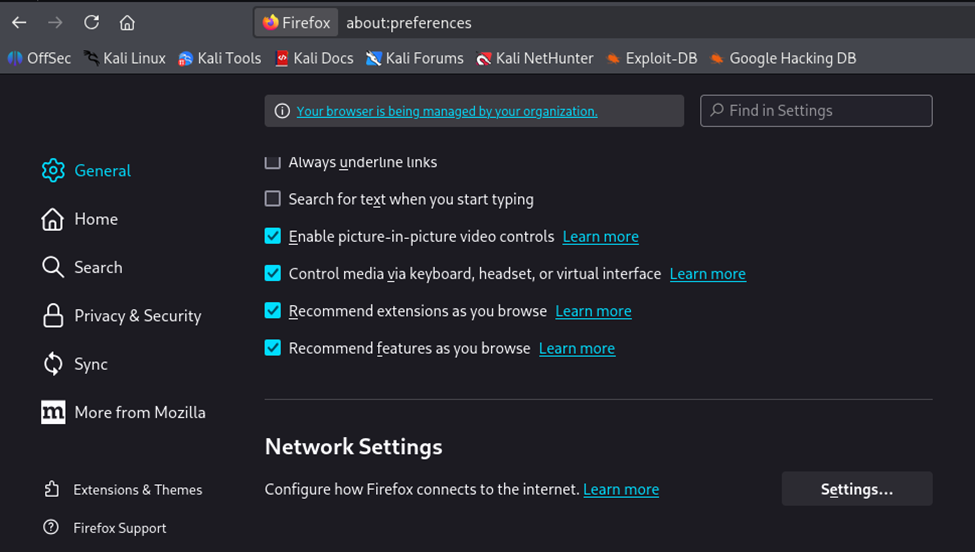
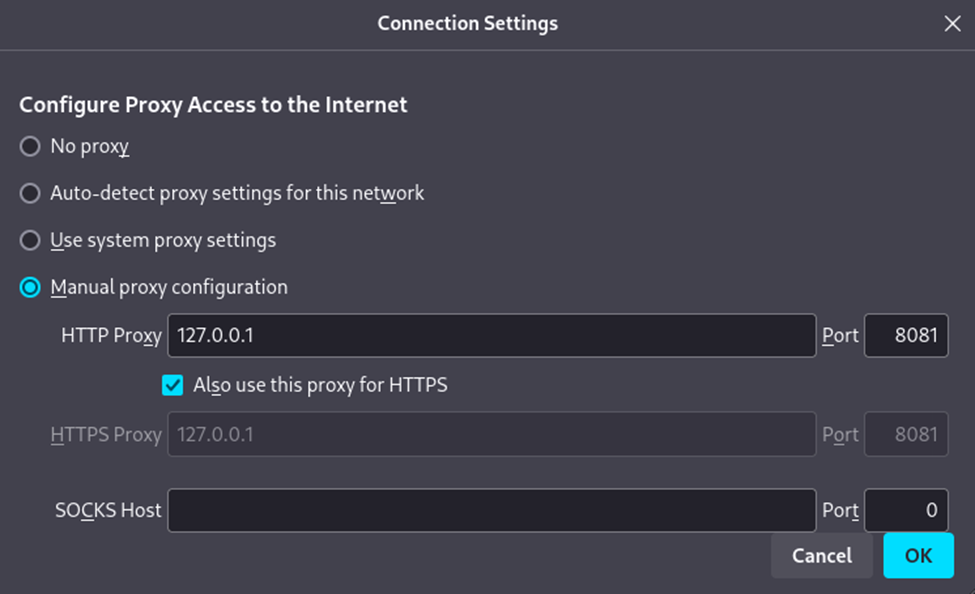
- Select “Manual proxy configuration”.
- Set HTTP Proxy to 127.0.0.1 and Port to 8080.
- Check “Also use this proxy for HTTPS” and save the settings.
Step 3: Install the CA Certificate
- To prevent security warnings and to inspect HTTPS traffic, you need to install Burp’s Certificate Authority (CA) certificate in your browser.
- Download the Certificate: With your browser configured to use Burp’s proxy, navigate to http://burpsuite
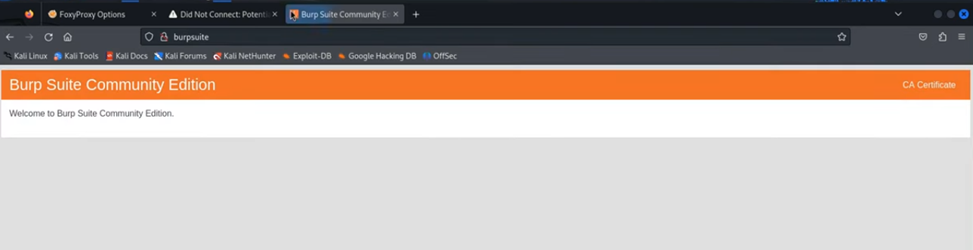
- On the welcome page, click the CA Certificate button to download the cacert.der file.
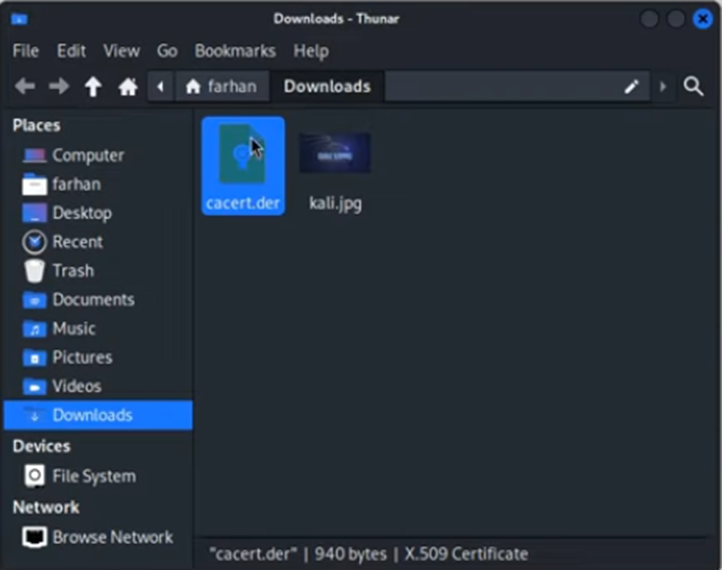
Install the Certificate in Firefox:
- Go to Settings > Privacy & Security and scroll down to the Certificates section.
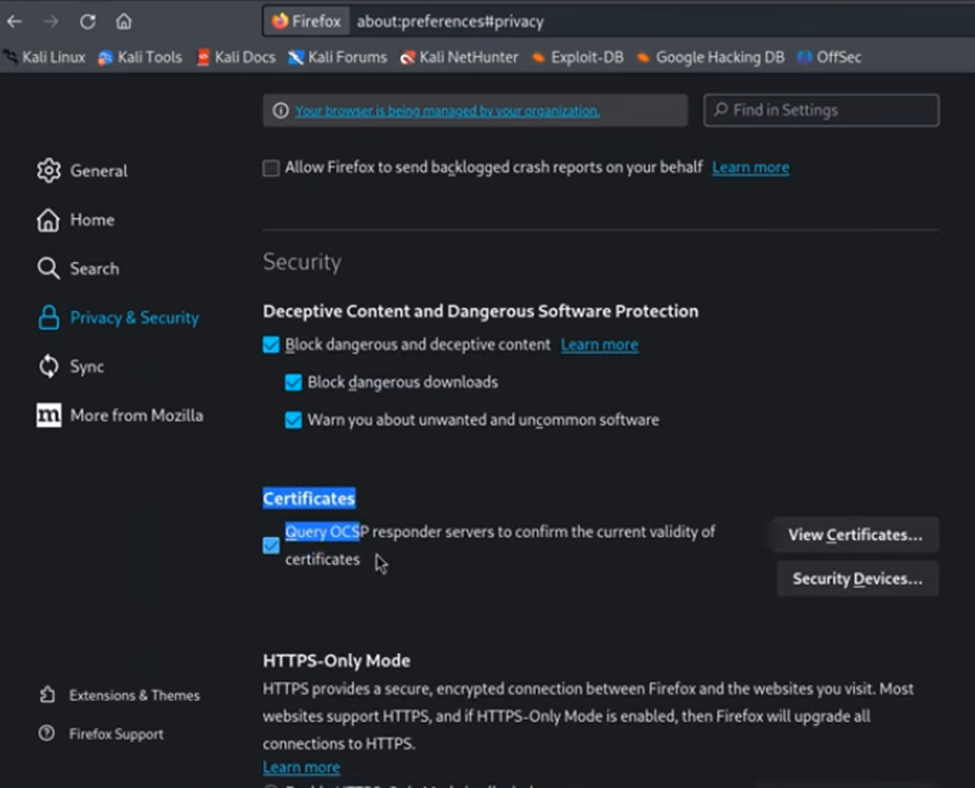
- Click “View Certificates…”.
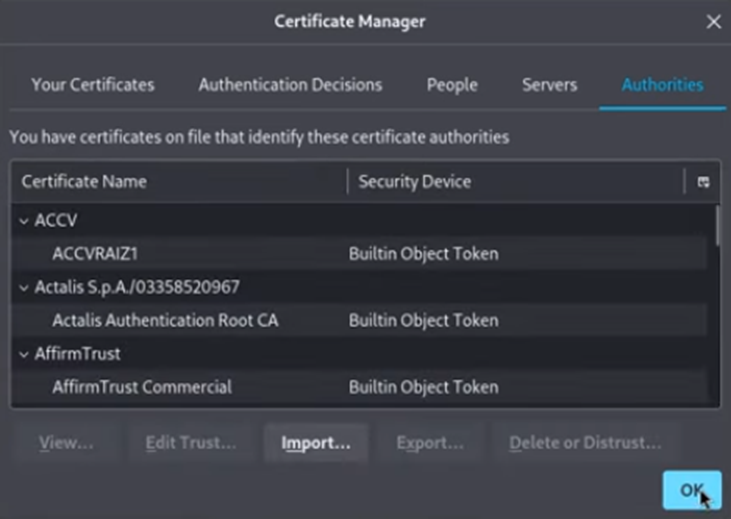
- In the Authorities tab, click “Import…”.

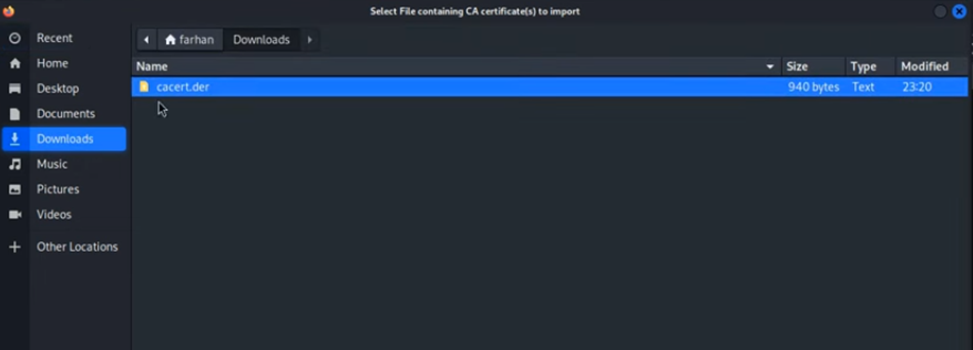
- Select the cacert.der file you just downloaded.
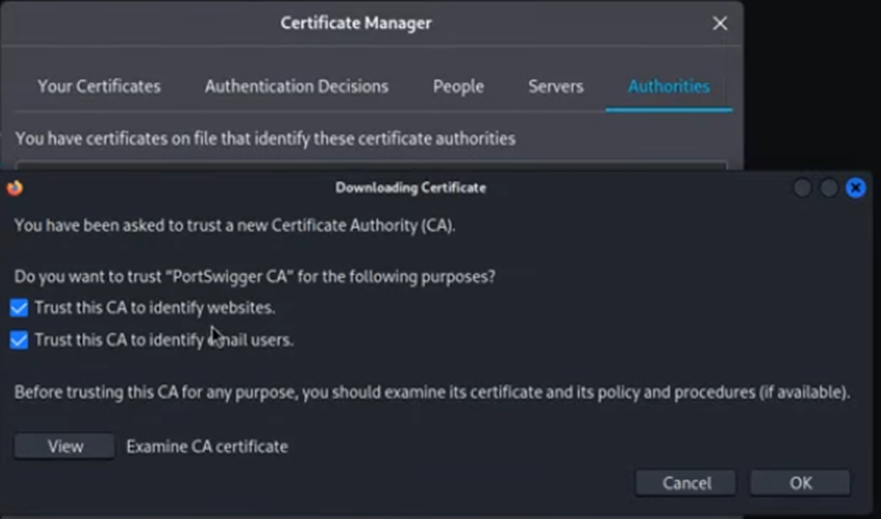
- Check the box for “Trust this CA to identify websites” and click OK.
- After these steps, your Kali Linux environment should be fully set up to use Burp Suite Professional for web penetration testing.
Installing Burp Suite from github:
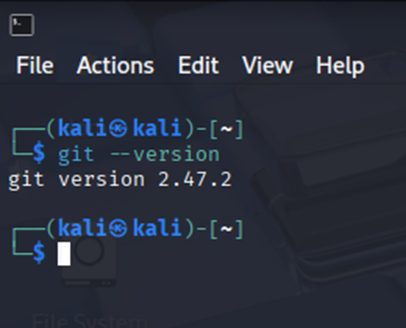
Step 1: Verify Git Installation
- Before you can clone the repository, you need to make sure Git is installed on your Kali Linux VM. Kali Linux often comes with Git pre-installed, but it’s always a good idea to check.
- Open a new terminal window in your Kali Linux VM.
- Type the following command and press Enter:
git --version - If Git is installed, you’ll see the version number. If it’s not, you’ll get an error message.
Step 2: Install Git (If Needed)
- If Git is not installed, you can easily install it using Kali’s package manager, apt.
- First, update your package list to ensure you’re getting the latest version of the software:
sudo apt update - Next, install Git by running the following command:
sudo apt install git -y
Step 3: Clone the GitHub Repository
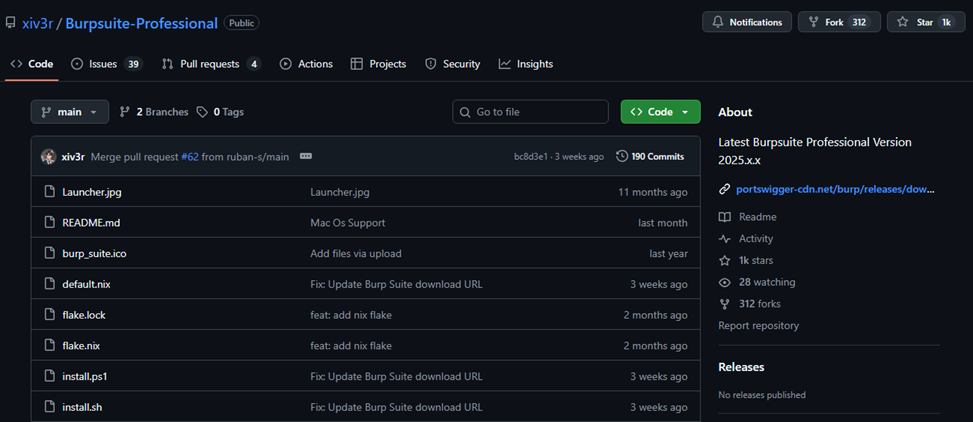
- Now you’re ready to clone the repository. You’ll need the repository’s URL.
- Navigate to the Burp Suite Professional GitHub repository you want to clone in your web browser. https://github.com/xiv3r/Burpsuite-Professional
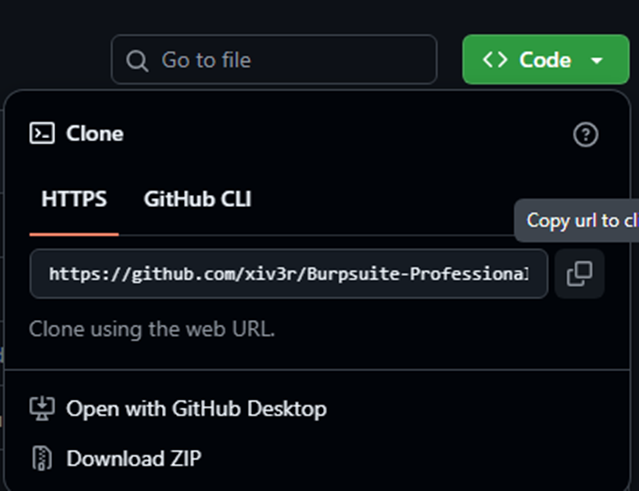
- Click the green “<> Code” button.
- A dropdown menu will appear. You can choose to clone using HTTPS or SSH. For most cases, HTTPS is the easiest method. Copy the URL by clicking the clipboard icon. https://github.com/xiv3r/Burpsuite-Professional.git
- Return to your Kali Linux terminal.
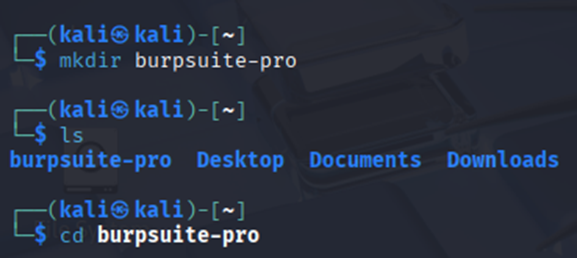
- Navigate to the directory where you want the repository to be cloned. For example, to move to your Documents folder: cd burpsuite-pro
- Use the git clone command followed by the URL you copied. git clone https://github.com/username/repository.git
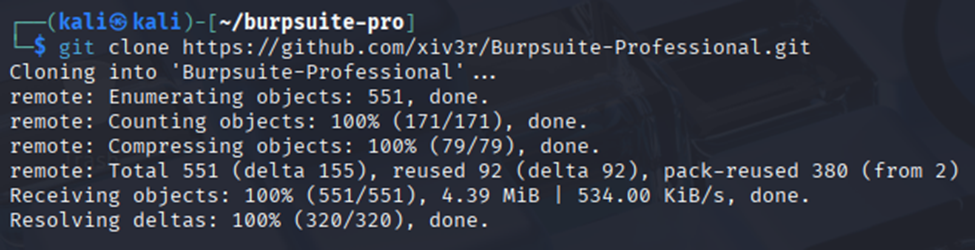
- Press Enter. Git will download the repository, including all files and commit history, into a new folder with the same name as the repository. You can now access the files by navigating into that new directory. cd repository
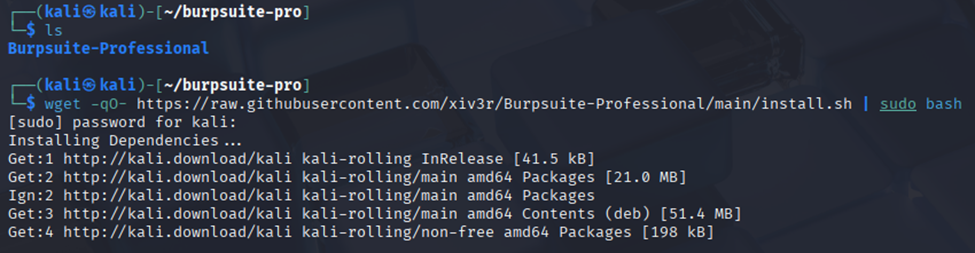
Step 4: Installing all dependencies
- Navigate to the new folder;
cd Burpsuite-professional - Use the following command to install all dependencies;
wget -qO https://raw.githubusercontent.com/xiv3r/Burpsuite-Professional/main/install.sh | sudo bash
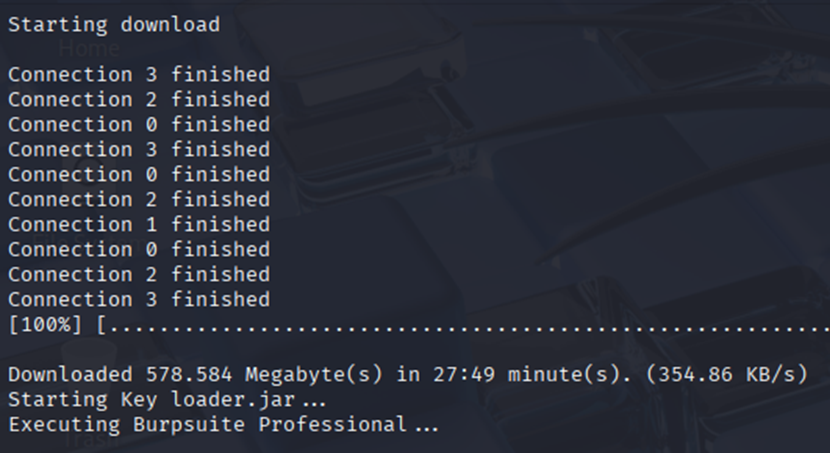
- After the installation is complete, you will receive the license key from keygen
- Use the following command to run the Burpsuite professional;
burpsuitepro
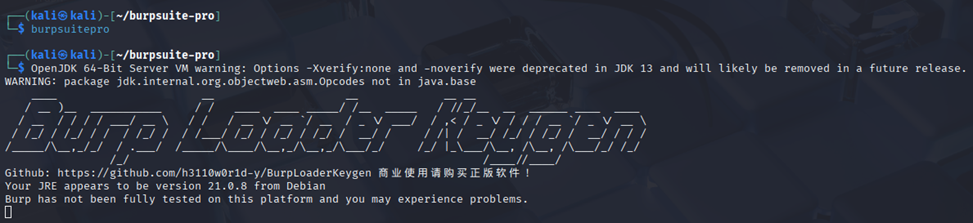
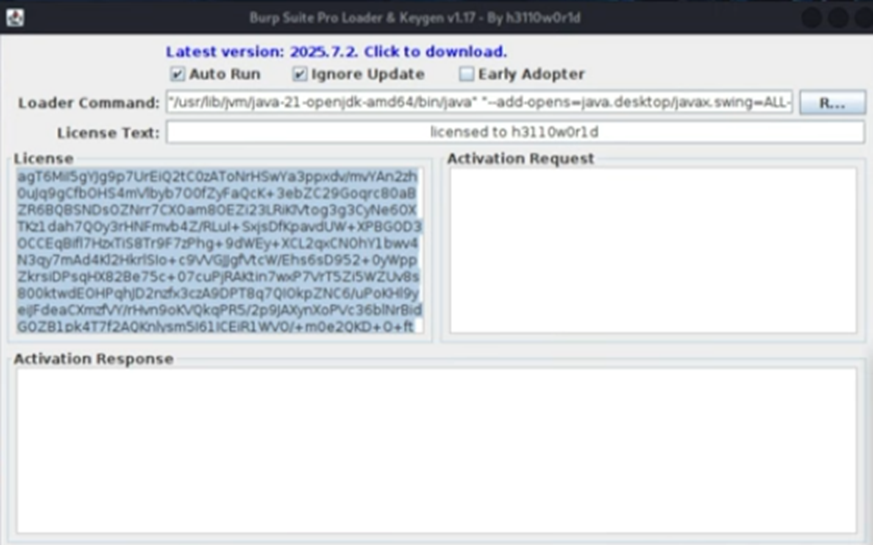
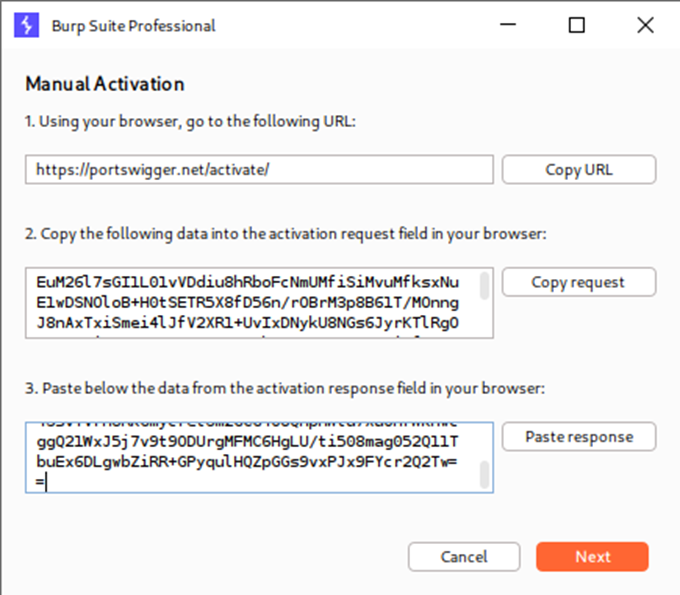
- After lunching burpsuite, it will request you to activate license to access the professional package,
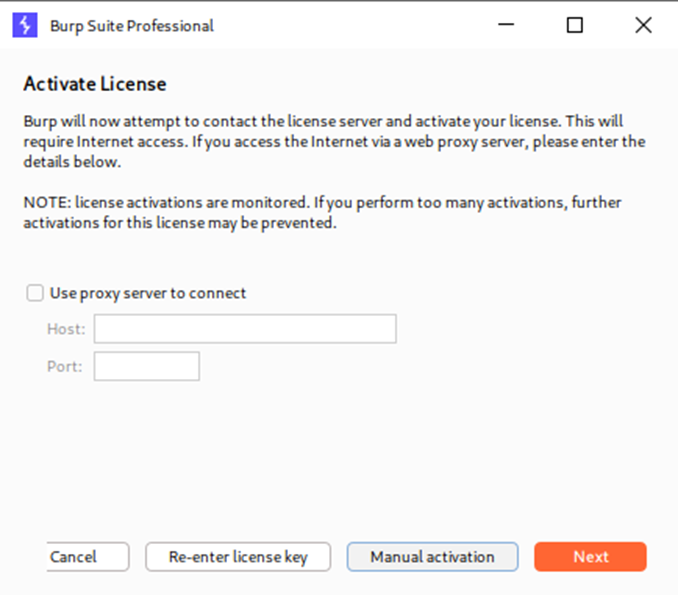
- From the above, click on manual activation, and it will prompt you to enter license key to activate.
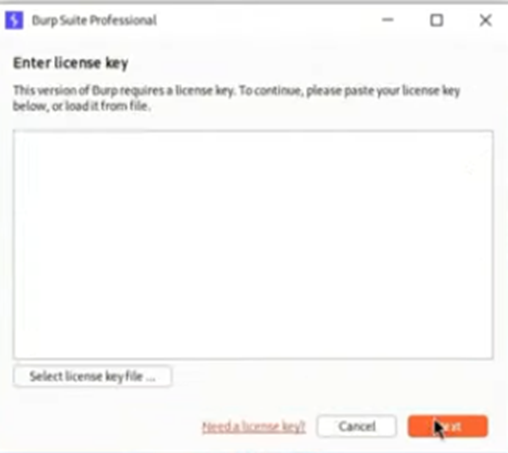
- Copy the license key from keygen and paste in the required field in burpsuite, and then copy the activation request and the paste in the required field.
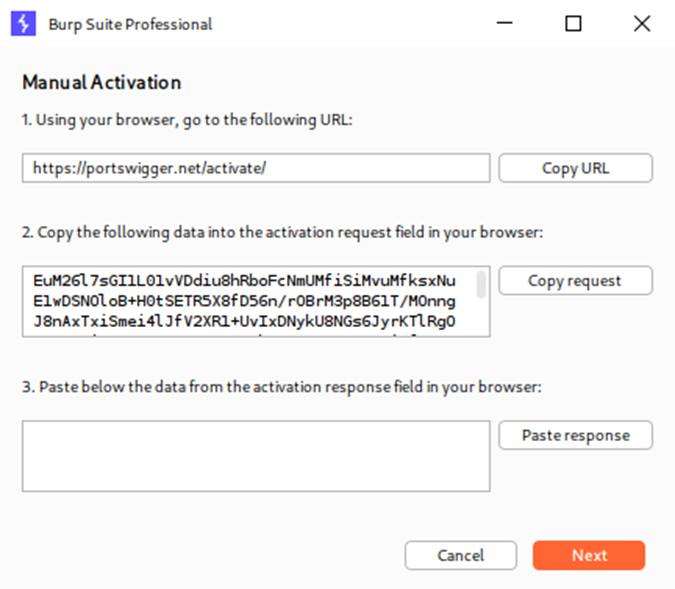
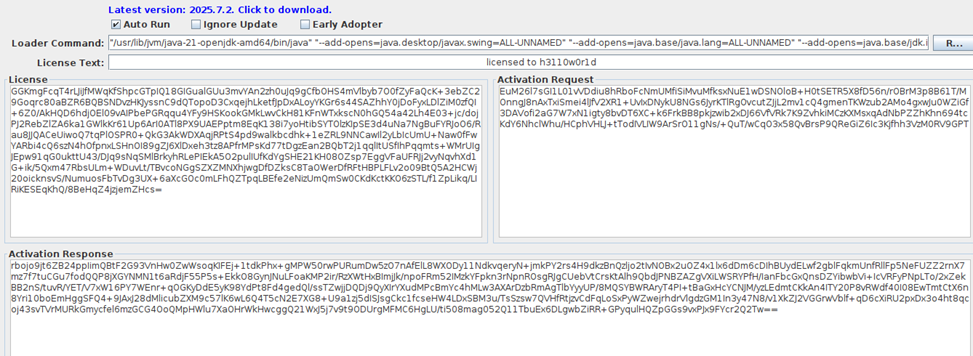
- Copy the activation response and paste to the required space in burpsuite, and then click on next > finish.
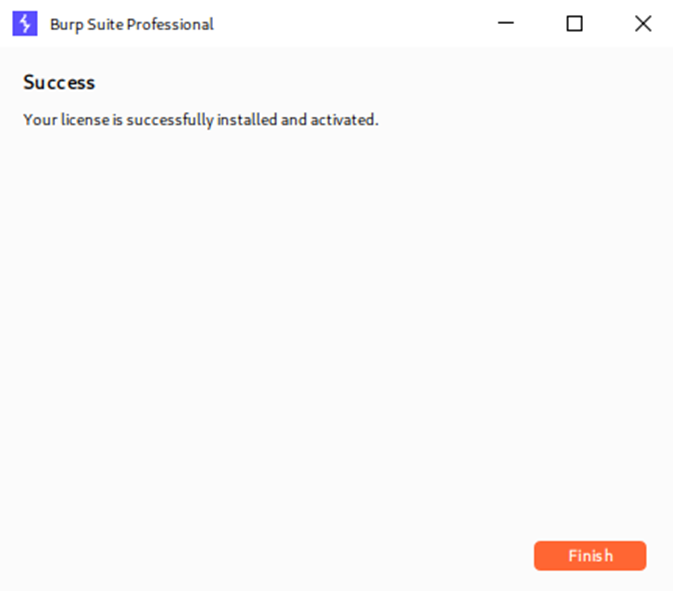
- After that, burpsuite professional will launch

Summary
This guide details two methods for installing and setting up Burp Suite Professional on Kali Linux. The first method involves downloading the installer directly from the PortSwigger website, making it executable, and then running it from the terminal. The process includes a license key activation. The second method leverages Git to clone a repository from GitHub, install dependencies, and then activate the software using a keygen. Regardless of the installation method, the guide emphasizes two critical configuration steps:
Proxy Configuration: Setting up your browser to use Burp Suite as a proxy (by configuring 127.0.0.1:8080) so it can intercept web traffic.
CA Certificate Installation: Downloading and trusting Burp Suite’s CA certificate in your browser to avoid security warnings and inspect HTTPS traffic.
Conclusion
The installation and configuration of Burp Suite Professional on Kali Linux is a fundamental step for anyone entering the field of web application security. By following the two outlined methods—either downloading directly from the PortSwigger website or cloning a repository from GitHub—you can successfully set up your environment. Proper configuration, particularly for the proxy and CA certificate, is crucial for intercepting and inspecting HTTPS traffic without security warnings. With Burp Suite, you can take control of web traffic, enabling you to manually and automatically test for a wide range of vulnerabilities and harden the security of web applications.